Friday 16 September 2016

Portrait of Dad using Clay and Oil Pastel


Yes, this is my THIRD post on Portraits of Dad - maybe I should have done them all in one?  Anyway I'm here now and here is my third way of doing a portrait of Dad for Father's Day.  These were produced by my lunchtime class at school in a 45 minute session - pretty impressive hey!  These children are in Prep - Grade 3 so I think the quality is pretty astounding considering their age and the limited time frame to produce these.  We also talked about Modigliani in this lesson so some of the long necks are influenced by this famous artist.

  
What you need:
  • Black pieces of cardboard (a lucky donation)
  • Oil Pastels
  • Balls of Clay
  • Spare Clay
  • Skewer
  • Watercolour Paints
  • Paintbrush & water pots
  • Glue
  • Sheet of plastic (I used overhead sheets also donated)
  • Clear gloss
How to:
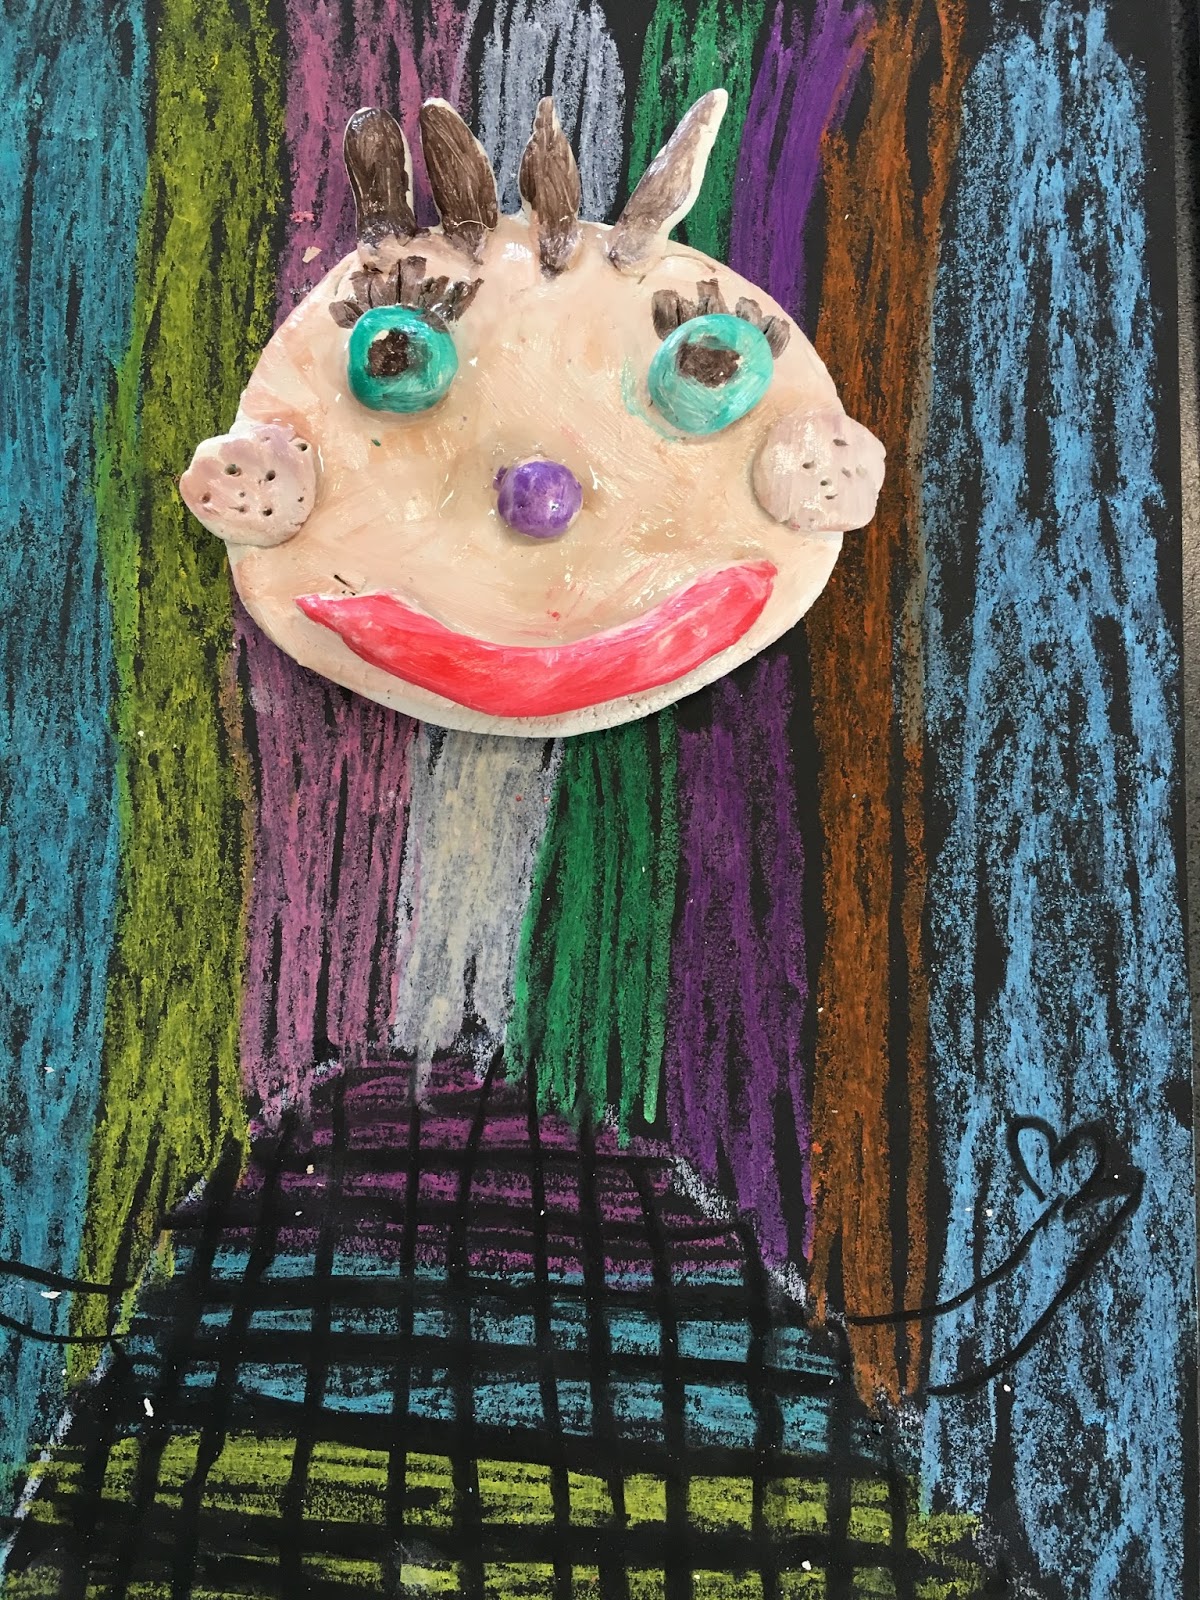
  • Instruct the children to draw Dad onto the black cardboard using oil pastels
  • Then cover this with a sheet of plastic
  • Give them a ball of clay which they squish down onto the plastic until its the shape and size of Dad's head in their drawing
  • Using the extra clay, skewer and water children make and attach eyes, nose etc (demonstration on how to attach properly given first)
  • Using watercolours they added some colour to the clay (whilst still wet).
  • The following week (when dry) I removed the sheet of plastic and glued the head to the picture and added a clear gloss.
The Results:

I'm so loving these!  I hope the Dad's like them too!


Cheers
Fiona

Thursday 15 September 2016

Portrait of Dad in the style of Modigliani


We often do portraits of Dad for Father's Day.  I actually know quite a few of the Dad's so its always fun seeing the children draw them, many of the portraits have such a likeness..

This project used the lesson by Art Projects for Kids on how to draw a Modigliani portrait and we just modified it to draw Dad.  Children were also encouraged to draw a background that Dad would like.  My students Prep - Grade 5 managed this.  The one above is by a Prep!

I have to say I love how these turn out.  Oil pastel on black paper is a great combo!

Check them out and Happy Father's Day to all the Dad's in Australia for last Sunday 4th Sep!


Cheers
Fiona

Tuesday 13 September 2016

Portrait of Dad using Plasticine (Preschool Art)

My preschoolers recently produced these fab portraits of Dad for Father's Day.


So easy to do and I'm just loving them.  It was also great for their fine motor skills to break up and squash in the plasticine.

What you need:
  • Printout of head
  • Black permanent marker
  • Laminator
  • Different Coloured Plasticine
  • Pipecleaners
  • Beads

How To:
I laminated the printouts of the head (prior to lesson), then gave each child one of these.  I first instructed them to add to the printout using the black marker, adding eyes, nose etc.  Then they "coloured in" their portrait by adding small pieces of plasticine and squashing it into to sheet.
As a final step each child threaded beads onto a pipe cleaner and we hole punched the top and threaded it through as a hanger.

The Results:
How cute are they!


Well done preschoolers!

Cheers
Fiona

Monday 12 September 2016

Trophy for the Worlds Best Dad


My preschoolers decorated these homemade trophies for Father's Day.  They just loved sitting there and sticking on all the bits, some worked on theirs for ages.  The room was actually silent for a while with all that concentration going on.

What you need:
  • plastic wine glass
  • plastic bottom (I used donated plastic containers from cat food)
  • gold spray paint
  • glue gun
  • jewels, pom poms, ribbon, washi tape, stickers to add on
How to:
  • Glue wine class to bottom and spray gold (prior to class)
  • I gave each child the trophy and a bowl of goodies to add on and then just left them to it.
The Results:

Pretty!


Cheers
Fiona

Sunday 11 September 2016

Olympics Lesson - Part 2: Foil Athletes


Part two of our Olympic Lesson concentrated on what the Olympics is all about - the athletes.  I had children in Prep - Grade 5 doing this lesson.

I did a very similar lesson to this 2 years ago when the Winter Olympics were on and the children so LOVED it....So I thought it would be easy to replicate for the Summer Olympics.

I just love how this lesson really brings out the children's creativity.  I put out lots of loose parts for them to choose from to create the accessories and then left them too it!

What you need:
  • Tin foil
  • Glue gun, normal glue and sticky tape
  • Loose Parts
  • Cardboard
  • Coloured paper or paint

How to:
  • Demonstrate how to make a foil figure (click here for my previous post on how to do this)
  • Ask the children to decide which athelete it is and put it in a pose
  • Use the loose parts to add things like weights (weighlifter), beam (gymnast), sword (fencing), basketball & hoop (basketball), oars (canoing) etc etc.
  • They could also use the cardboard to add a floor (eg gym mat, running track, basketball court etc) 
  • I asked them to try and stick together using glue and sticky tape yet I was also ready with a hot glue gun to stick down any bits that wouldn't stay with those methods.

The Results:

Here are a few I captured - these children are so creative!


Cheers
Fiona