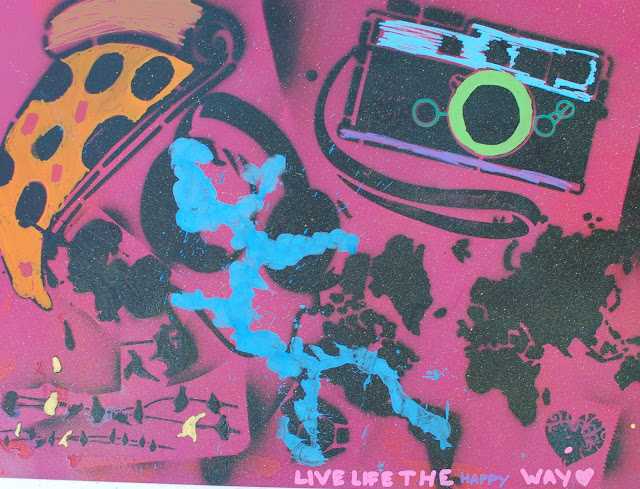
I have to say I was a little scared about these lessons. I was really going against the "rules" here when it comes to allowing young children to use spray paint. The children who produced these were aged 6 to 12. We did do this outside in a large ventilated area, with masks and using low toxic sugar spray, yet I was still nervous. However the end results were pretty terrific and the children really seemed to enjoy the experience.
We started the lesson with a little bit of inspiration from these two video's:
Graffiti always wins - NGV Studios. Love how this shows lots of different street art techniques and a group of artists working together.
100 Most Creative Street Art - Some of these artists are just so clever and talented!
We also looked at the work of Melbourne Street Artist HaHa who does a lot of multi layered stencil work, especially of Ned Kelly (a famous Australian bush ranger).
What you need:
- Spray Paint (I used Sugar Spray Paint)
- MDF Boards (or canvas boards) to paint on
- Stencils (I've been collecting them over the past few months, also had a lucky find at a warehouse sale of layered stencils).
- Posca Paint Pens

How To:
- We did a background first to get the hang of spray painting. They just used several colours to create a mottled effect. It was handy to get them to used to spraying from the right distance and how hard to push the nozzle. For very young children I sometimes got them to put their finger over mine and we did it together (some didn't have the finger strength to push hard enough).
- I only had 3-4 children spraying at once to minimise the fumes and so I could help out.
- I kept the children busy when waiting for their turn or for the paint to dry by getting them to draw on brick paper. They were asked to come up with a street art name for themselves and to imagine that they had been given permission (an important aspect to reinforce when teaching street art) to design the wall in any way they wished. I gave them a handout on how to do graffiti writing.
- When the background was dry they started stenciling. Its important to let each layer dry in between if doing a multi layered stencil.
- We added final details with Posca Paint Pens the following week.
The Results:
Bright and colourful that's for sure!
And here are some examples of the work they did whilst waiting for layered stencils to dry:
Cheers
Fiona


No comments:
Post a Comment