Wednesday, 9 April 2014

Abstract Painting with Kids (including more Splatter Painting)


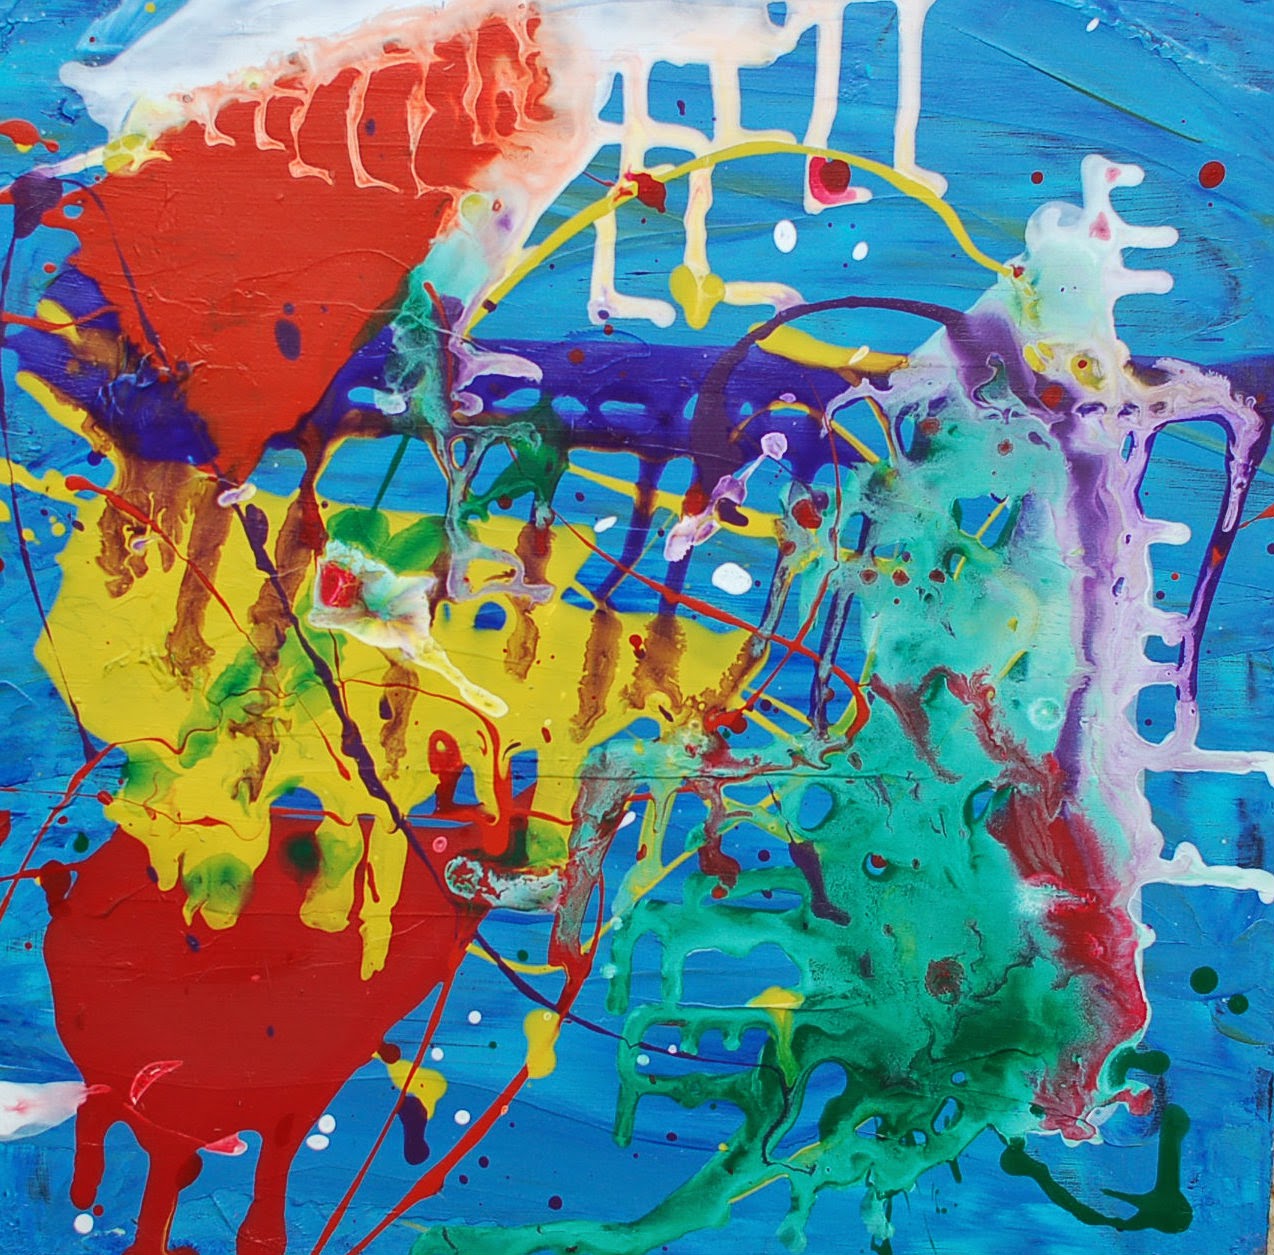
I did some abstract painting with the children in my art classes over the last few weeks of term.  The hard thing with doing such art is stopping them from getting carried away and ending up with a blurred brown mess.  It can look wonderful one minute and then a mess the next.  All the paintings in this post are produced by children 5 to 9 years old.

Spatter painting
I do however think that doing abstract art with children is important.  It shows them that creating art is not just for those people who are good at drawing.  Anyone can create art and being experimental and willing to try new techniques is all part of the creative journey.

I love classes where I can show them new techniques and get them to try things they had never thought of doing......

Abstract painting on MDF primed with white gesso
I have to admit that one class didn't quite go to plan.  I'm sure you have all had this experience at some stage of your lives (work function, teaching, kids art activity at home) when you think its going to be the best class / activity ever and then it all goes pear shaped....I had to steal one of my husbands beers at the end of that class!

I really thought the children would get into the abstract painting yet one or two weren't so keen and what I failed to do initially was make enough guidelines to stop the "brown mess"....  I ended up changing the lesson the second time around and getting my first class to add to their paintings again in another class.  In the end they all worked quite well. 

close up of our group tall painting (see end of post)
What I learnt was don't give them the colours to make brown!  Get them to do the backgrounds in either cool or warm colours so they can only mix them to a variation of orange or blue.  Secondly do the painting in two stages.  In the second sitting (either different day or after a quick break) tell them they are now no longer able to touch their painting and they must drip paint on and move it around by tilting their board.  This prevents too much blending and leaves some of the drops and pretty dribbles.

What you need:
  • MDF boards primed with Gesso (you could use canvas boards instead)
  • Thick paints for backgrounds on lids (in cool or warm colours)
  • Thinned down paint for dribbling (in various colours)
  • Pipettes
  • Drizzling sticks (I found those large pop sticks worked really well)
  • Paint Effects tools for backgrounds (we used plastic spatulas, credit cards and palette knifes)
How To:
  • Backgrounds - use the paint effects tools to do an abstract background
  • Second layer - use the runny paint to add a second layer of paint in either dribbles or by adding blobs of paint and tilting the board to make it drizzle around (this created a pour painting effect).
The Results: Actually these turned out much better than I remembered.  When I was editing these photos I thought I would be happy to put a number of these up on my wall.  Some are really lovely.


For my Saturday class I just stuck to my standard Splatter Painting class (click here and here for previous posts on this).  I just love this class and this one is nearly fail proof.  The things that work really well in this class is showing the Jackson Pollock Video first (click here) this really sets the scene in what we are trying to produce and how.  Tell them not to let the paint brush touch the canvas, all paint must be splattered, thrown, drizzled or sprayed onto the canvas.  Use canvas boards as these can absorb all the paint and stay put on the ground.  Put the canvas on the ground and get the children to stand over their canvas (like Jackson does).  Use runny paint (water it down to a consistency that drips from the brush easily).  Get the children to wear old clothes (this can get very messy) and have a bucket ready to wash feet in afterwards.

Saturday class results:


Finally - I just ran a holiday workshop called "Abstract Painting for Kids" where we did both splatter painting (on canvas) and an abstract painting (on MDF primed with black Gesso) using the same techniques as above.  Again the results are really stunning:


Abstract painting (on MDF with back gesso)

Spatter painting (on white canvas boards)
We also did a group "Tall Painting" in the workshop.  I primed some Plywood with black gesso, hot glued on some old kids building blocks we had lying around and then we spooned the runny paint over the top.  Each kid got a go at spooning the paint on.  We watched the video showing how Holton Rower makes his famous tall paintings first.  Watch this - its facinating!!!  This unusual painting is going to be a lovely addition to the studio.


Happy painting!

Cheers
Fiona


Thursday, 3 April 2014

Purple Day Lesson / Harold and the Purple Crayon

It's Purple Day in Australia on the 26th March.  Purple Day is all about raising funds and creating awareness of Epilepsy.  You can donate to Epilepsy Australia or learn more by clicking here.

The book "Harold and the Purple Crayon" immediately came to mind when planning a Purple Day lesson.  Its a great book for children to listen to as it reminds them to use their imaginations.  A very important skill for an artist!


Harold and the Purple Crayon is a book written and illustrated by Crockett Johnson.  Crockett Johnson's understated tribute to the imagination was first published in 1955, and has been inspiring readers of all ages ever since. Harold's quiet but magical journey reminds us of the marvels the mind can create, and also gives us the wondrous sense that anything is possible. 

As usual I did a bit of a google search for lesson plans to go with this book and came up with this one from Kinderart which I used as inspiration.

What you need:
  • Black paper
  • Shapes from different purple papers  (I divided these so the children had at least 8 to choose from and placed them in brown paper bags - one per student)
  • Other purple embellishments (buttons, ribbon, sequins, beads, wool, glitter)
  • Glue Sticks (for the paper shapes) and white school glue (for the buttons and heavier objects)
  • Scissors
  • Purple and White oil pastels (or crayons)
How to:
  • Read the book "Harold and the Purple Crayon"
  • Hand out the brown paper bags and black paper
  • Tell them there are a few rules before they start:  They must draw themselves (in white pastel) holding a purple crayon.  They need to use at least 3 shapes in their pictures, they are allowed to cut one shape. They need to use their IMAGINATIONS to draw a scene around themselves using a purple oil pastel and the shapes.
  • They can add embellishments and glitter at the end
The Results:
Lots of Purple loveliness....


My Saturday class also did some Purple "Tint and Shade" Moons and Trees. 


If you need any further motivation to ensure your children use their imaginations & continue creating - read the below information taken from the "Story Time for Me" website: 

Imagination and Creativity in Early Childhood

Many parents may not realize that daydreaming is not just a “waste of time”, but actually a necessary process, essentially stimulating important cognitive activity – imaginary thought process. It is actually very important to allow children to have free time to engage in creative play and even just day dreaming. Creativity and imagination are among high level cognitive skills that need time to develop properly.  By engaging in creative projects and activities or even free play children learn to develop their unique creative skills and talents. Parents and teachers of young children need to make sure they provide sufficient opportunities and find suitable activities that will address each child’s unique creative needs. Watching television or DVDs, or playing primitive video games do not offer any possibility to develop creativity nor stimulate cognitive development. Drawing, reading children’s books, such as Harold and the Purple Crayon, coloring or doing arts and crafts projects are the types of activities that can constructively engage children and encourage them to use their imagination and creativity. Creative ideas often occur when the brain is in a relaxed state, when the mind is free to roam and reiterate on the previously learned concepts and ideas, and often come up with new meaning and generate a new outlook and understanding. Stories like Harold and the Purple Crayon can often stimulate creative thinking and encourage imaginative approach in children. By creating a relaxing and pleasant atmosphere at home or in the classroom, and using original and entertaining educational projects, parents and teachers can successfully stimulate young children’s creative thinking and help them develop unique talents and skills. Most children love to draw, but many get discouraged because of negative feedback their initial work produces from their peers and teachers. Encouraging children to engage in creative projects and praising their work can often lead to surprisingly positive results and greatly enhance their self image.

Cheers
Fiona

Tuesday, 1 April 2014

Washing on a Line


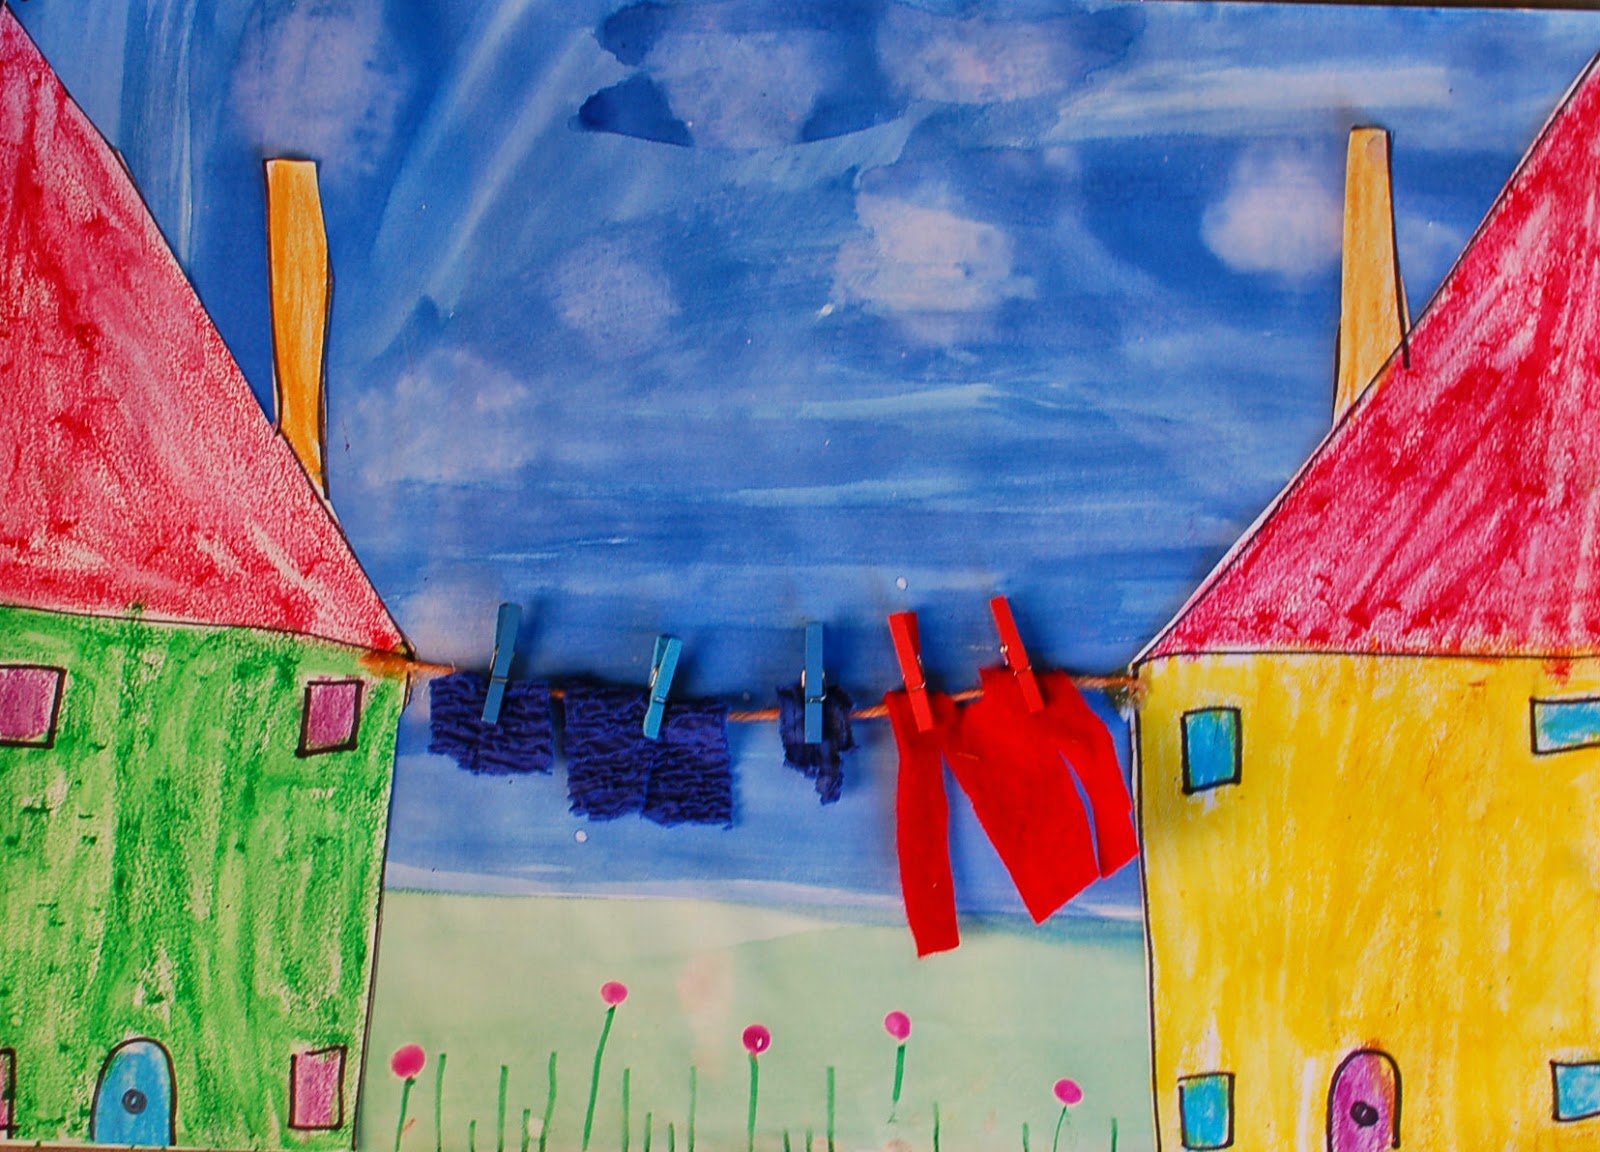
My daughter owns the "Usborne 365 things to do with paper and cardboard" book and she had tagged this lesson as one to try (its on page 94).  We took their concept of washing on a line yet made it more 3D by adding wool for the line, clothes made out of material and we used those little craft pegs you can find at the $2 store.

What you need:
  • A3 cartridge paper (2 per student)
  • Wool
  • Craft Pegs
  • Scraps of Material, buttons
  • Hot glue gun
  • Water Soluble Pastels & Water Pens (you could use paint, texta or normal pastels instead)
  • Glue
  • Scissors
  • Blue, green and Pink Liquid watercolours
  • Cotton buds
  • Green watercolour Pencil 

 How To:

The Background:
  • Paint the grass green and the sky blue.
  • Use a tissue to dab off some sky paint to make clouds
  • Using a cotton bud, add flowers in pink paint
  • Add stems and leaves with the green watercolour pencil
The Buildings:
  • Draw two structures for the washing line to go between (buildings or trees)
  • Colour in
  • Cut out
  • Paste to the background
The Washing Line:
  • Cut a piece of wool to fit between the two buildings and hot glue into place
  • Make clothes for the washing line out of material or paper
  • Peg to the washing line using the craft pegs
We did this over two weeks so that the background had a chance to dry before gluing on the buildings.

 
The background looks great in this one - looks as if its raining!


The Results:
Lots of pretty washing flapping in the breeze.....


I searched high and low for an artist of the week that would go with this lesson.  In the end I decided to choose someone I found on the Internet - to demonstrate to the children that there are many different ways people can promote their work. Our artist of the week when we did this lesson was Nel Jansen (click here for more information - you may need to scroll down).

Cheers Fiona


Thursday, 20 March 2014

Giraffes Can't Dance


 I've had my eye on this lesson for a while now.  I've spotted it a few times on the internet and the pictures look fun to do.

Its based on the book, Giraffes Can't Dance by Giles Andreae with illustrations by Guy Parker - Rees (who was our artist of the week - click here for further information)


I used the lesson plan by Patty at Deep Space Sparkle as inspiration (her lessons are always so good!) with a few changes here and there.

What you need:
  • A3 cartridge paper - two per student
  • blue, green, yellow and white paint
  • bamboo sticks
  • glue sticks
  • scissors
  • silver paint or pens
  • yellow and orange / brown liquid watercolors
  • Black permanent markers
  • Pencils
  • scrap paper to practice on
  • Silver glitter (optional)
  • Giraffe photos (optional)


How to:
Week One
  • Read the book
  • Do a guided drawing of a giraffe on the whiteboard
  • Get the children to follow along and then on a practice piece of paper get them to draw giraffes in different dancing positions
  • When they are happy with one get them to copy this onto the A3 cartridge paper, first in pencil then go over lines with black permanent marker
  • Colour in using yellow liquid watercolour with orange / brown as spots
  • Leave to dry
  • For the background - ask them to draw a moon and a line across the bottom for the grass in pencil
  • Paint the grass area yellow
  • Paint the sky blue, ensuring they leave out the moon
  • Paint the moon with white paint (new brush) then go around it in circles to create the lighter blue area around the moon
  • Paint over the yellow grass with green paint
  • Scratch in grass and flowers with bamboo skewers
  • Leave to dry

Week Two
  • Cut out dancing giraffe and glue onto background
  • Add stars with silver paint or pen
  • Add glitter to stars (optional)
The Results:
These make me smile ...... Didn't they do a good job!  Giraffes are pretty hard to draw for 5-9 year olds yet they took on the challenge and I love what they did.  Yes a few boys drew the giraffe landing on his head (that's boys for you) and some of the girls added pink tutus (that's girls for you).


Cheers
Fiona

Tuesday, 4 March 2014

Winter Olympics Lesson - Part Two (Russian Buildings)

For Part 2 of our Winter Olympics lesson we concentrated not on the actual sports themselves yet the host nation - Russia.


Russian buildings are just beautiful to look at and were a major part of the opening ceremony and even the backdrop on our winter Olympic TV coverage.  We looked at photos of St Basil's Cathedral and then went on the produce pictures inspired by these.


After a quick Google search, I'm certainly not alone in producing a lesson plan based around St Basil's Cathedral.  Deep Space Sparkle, The Art of Education and Create with Me also have excellent lessons on the same subject (I took bits and pieces from each - thanks!).


We produced these pictures over 2 lessons with children aged 5 to 9.   These would turn out really well using liquid watercolours.  I decided to use water soluble pencils and pastels instead as I'm keen for the children to be proficient in as many mediums as possible.  Also watercolour pencils are much more readily available to purchase and use at home.

What you need:
  • Watercolour pencils and / or water soluble oil pastels
  • A3 watercolour paper
  • Water pens (or just simple paint brushes and a water pot would also suffice)
  • A3 cartridge paper
  • Blue and white paint
  • Sponges (I just cut cheap supermarket ones into small pieces)
  • Black permanent markers
  • Scissors
  • Glue
  • Glitter glue (optional)
  • Stick on jewels (optional)
  • Gold and silver markers or paint (optional) 

How to:
  • Using sponges create a background on the cartridge paper with the blue and white paint (I just left them to it with this.  Interestingly some completely blended the colours to a light blue even background and others didn't blend and left a sponged effect).
  • On the watercolour paper draw buildings using a black permanent marker
  • Colour in using watercolour pencils, pastels and water pens
  • Cut out buildings and glue to the background
  • Add further details using gold and silver pens / paint, glitter glue and stick on jewels
The Results:

I'm happy with how these turned out.  The children also really took their time with these which was great to see.  I often find they really rush through art and by doing a bit each lesson they went a lot slower.


And for those of you interested here is a bit of information about St Basil's Cathedral (taken from Parent Art Docents - thank you!)

St. Basil's Cathedral is in Moscow's Red Square, and was begun in 1555, during the reign and by order of Ivan the Terrible. (Ivan was actually very terrible - he was mentally unstable and prone to violent rages. Also his henchmen were brutal in their use of assassination and physical punishment). Anyway, the cathedral is designed to look (see if you can guess by looking at the slide show pictures!) like a bonfire, flaming into the sky (this is inspired by a passage in the book of Revelations, which describes the Kingdom of God and the vivid colours therein). There is no precedent for such a building - it is an example of wild and bold creativity by the architects, and inspired many buildings that were built after in Russia and the countries around it. Note the vivid colours on each tower, and the different patterns on the exterior of the building.

Cheers
Fiona

Tuesday, 25 February 2014

Winter Olympics Lesson - Part One (Tin Foil Trophies)


I just loved the Winter Olympics.  I couldn't let the opportunity pass for yet another themed lesson as this one only comes around every 4 years!

I once again indulged in my love of baking (sugar cookies with coloured icing)...

Olympic rings biscuits for afternoon tea.
It was then onto the lesson which I'm going to publish over two posts.

The first thing we did was make some tin foil trophies.  I was originally going to cover the foil with paper mache inspired by "2 peas and a Dog" (who give great instructions on how to make the foil figure - thanks!) Yet when my children saw what I was doing they told me it looked like a trophy so the trophy idea was born and we stuck with that (so much easier!!!).

Before the lesson we discussed the winter Olympics, what the children had been watching, what sports they enjoyed and looked at some print outs of people participating in the various sports.

What you need:
  • tin foil
  • cardboard or wood to mount trophy on (I just used some cardboard offcuts I had, wood would have looked really cool)
  • textas
  • hot glue gun
  • pop sticks (large = snowboards, small = skis, small cut into bits = iceskates) and bamboo skewers.
How to:
  • Cut three slits in the piece of tin foil (as shown).  I did this prior to the class and handed out the tin foil like this.  I didn't measure these as instructed on the "2 peas and a Dog" blog yet just free hand cut them. I've tried to highlight and make the splits a little bigger in the picture so you can see them more clearly.  I decided against the children doing this themselves as I imagined many cutting it the wrong way and wasting the foil.
  • Carefully scrunch up the head, arms and legs (as shown).  Then scrunch in the middle.  I demonstrated first then got them to follow along with me when I did it a second time.

scrunched up head
scrunched up head, arms and legs
  • Once you have the general shape of a person you can scrunch up the foil more moulding it into shape (as shown). If the arms or legs end up too long just fold them over and scrunch some more.  NOTE:  a few children managed to pull off heads and arms.  Don't worry about it, just pass them another piece of foil and get them to start again.
scrunched even more - now it looks like a person!
  • Position the person into a sports position
  • Using a hot glue gun (the children came up to me and I did this for them) add ski's, snowboard, ice skates etc using the pop sticks, skewers etc
  • Using the hot glue gun attach the figure to the trophy mount (if you want it in the air doing a trick spear the figure with a skewer then glue the skewer to the mount)
  • Decorate the trophy mount
The Results:

Here are some quick snaps I took of some of them before they went home on the day I wish I took more photos as they were so cool, especially the ones doing tricks in the air.  Some children also decorated the snow boards and skis (I supplied coloured and plain pop sticks so they had this option).

These can easily be done in a 45 minute lesson and by children as young as 5.


Our Artist of the week is Marc Chagall as he was born in Russia and his art was heavily influenced by the Russian village he grew up in.  Click here to go to our Artist of the week page.

To go with the Russian / Winter Olympics theme we also listened to Tchaikovsky during the lesson.

Cheers Fiona